Welcome to this all-inclusive guide on measuring hydraulic fittings, a crucial task that demands precision and expertise. Whether you’re a seasoned hydraulic salesperson or a maintenance professional, this guide is designed to walk you through the entire process. From selecting the right tools to understanding the significance of each measurement, we’ve got you covered. We’ll also shed light on common mistakes that can compromise your hydraulic system’s integrity. So let’s dive in and set the stage for a hydraulic system that’s both reliable and efficient.
When it comes to measuring hydraulic fittings, you can’t afford to skimp on tools. The right tools not only make the job easier but also ensure that you get accurate and reliable measurements. Here’s what you’ll need:

These are your go-to tools for measuring the diameter of the threads. Calipers are more precise, but a good-quality measuring tape can also do the job.
This tool is essential for determining the thread pitch, which is the distance between the threads. A wrong pitch can lead to incompatible fittings, so don’t overlook this.
These charts contain standard sizes and dimensions for various types of hydraulic fittings. They’re a quick way to cross-reference your measurements.
Protractors can be used to measure the angles of hydraulic fittings. The commonly fitting elbows are 30-degree, 45-degree, and 90-degree elbows, and there also exist other elbows. Special gauges are available to measure the angle of the sealing surface inside and outside of the fitting, such as 37-degree cone, 45-degree cone, and 30-degree cone.
Before you even touch a caliper or gauge, there are some precautions you need to take:
Depressurize the System: Always make sure the hydraulic system is off and depressurized. This is not just for your safety but also for accurate measurements.
Wear Safety Gear: Put on your gloves and safety glasses. It’s better to be safe than sorry.
Clean the Fitting: Dirt and debris can affect your measurements. Make sure the fitting is clean before you start.


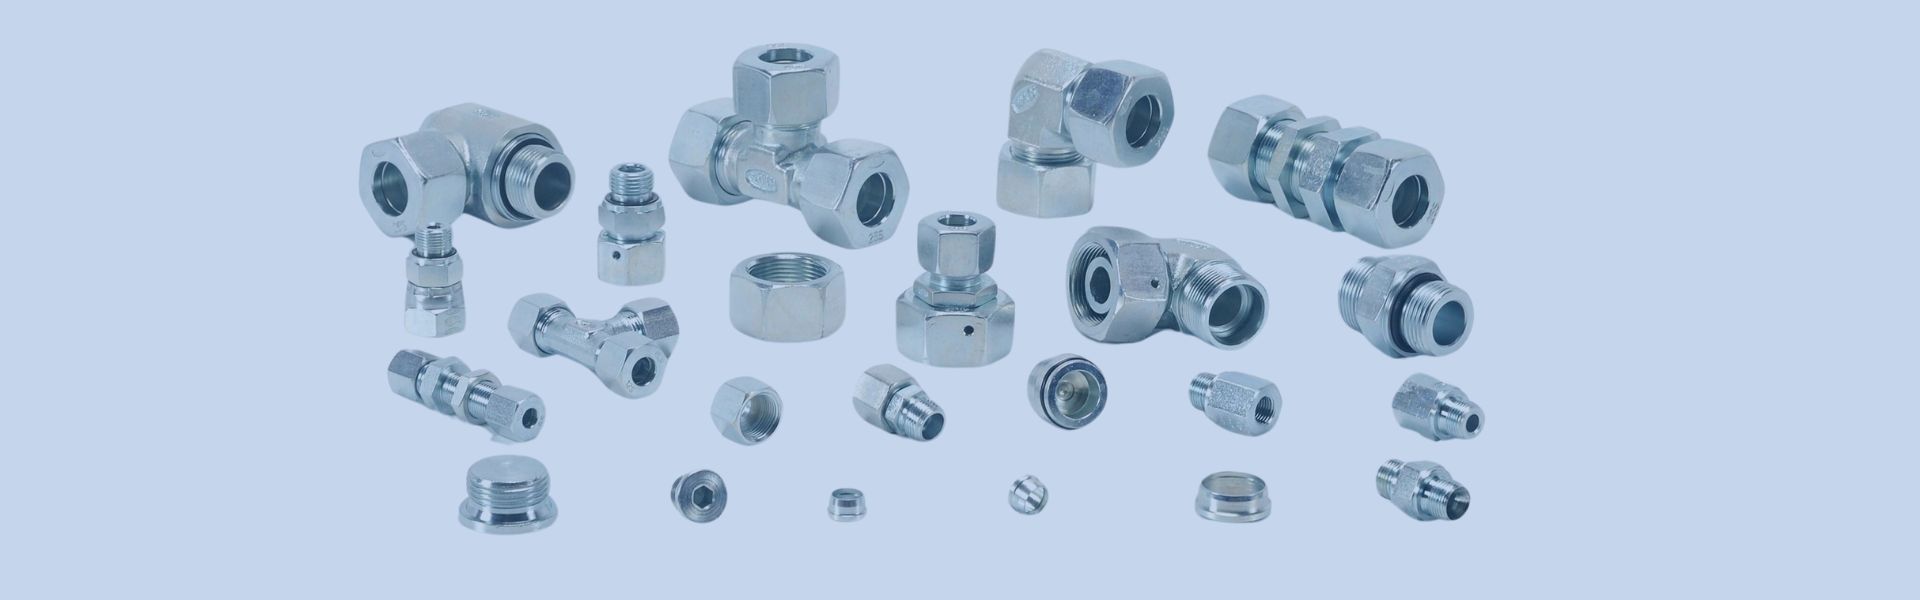
First, you need to determine the types of hydraulic fittings. Is it a hose fitting or an adapter?
Before considering measurements, you need to determine the type of hydraulic fittings to be used. This step is critical because each fitting type has its own set of specifications and compatibility requirements. Whether you are an experienced hydraulic salesperson or a maintenance professional, knowing the type of fitting is the foundation for the work that follows.
There are several types of hydraulic fittings, each with its own set of standards. The most common types are JIC (Joint Industry Committee), NPT (National Pipe Thread), and ORFS (O-ring Face Seal). These are not just random acronyms, but industry standards that define the shape, thread, and function of the fitting.
So how do you recognize the type of fitting? First, check the fitting itself for any markings. Manufacturers usually print markings on the fitting type so that it is straightforward to identify. For example, in general, a US fitting will have two scores on it, whereas an imperial will only have one. If not, consult the manufacturer’s guide or specification sheet.
Why is this step so important? Using the wrong type of fitting can lead to a host of problems, from small leaks to catastrophic system failure. For example, NPT fittings may look similar to BSPT fittings, but they have different thread patterns and sealing methods. Mixing them up can be a recipe for disaster.
In short, determining the type of fitting is not only the first step, it’s a critical one. It sets the stage for all subsequent steps, from measurement to installation. So take your time, utilize the resources available, and make sure it’s correct. This is one area where you can’t rely on guesswork.


Once the type of fitting has been determined, the next critical step is to measure the thread diameter. This may seem like a simple task, but it is both difficult and important. Thread diameter is a key factor in ensuring that hydraulic fittings are compatible with the rest of the system. Mismatched fittings can lead to leaks, inefficiency, and even system failure.
For this, you need a reliable measuring tool. Calipers are the most recommended standard tool in the industry, with accuracy to suit everyone’s needs. However, a high-quality tape measure can also do the job. Choosing between the two usually depends on the accuracy you need and the tools you have on hand.
For male threads, you need to measure the outside diameter. Place the caliper at the widest part of the thread, making sure it’s snug against the thread, but not so tight as to distort the thread. For female threads, the process is similar, but you are measuring the ID. Insert the caliper into the fitting and expand the caliper until it touches the inside wall.
Here’s a pro tip: Always double-check your measurements. Even the most experienced professionals can make mistakes, and in hydraulics, even a one-millimeter error can cause problems. Take several readings and then use the average value as the final measurement.
Why is this step so important? Because thread diameter directly affects a fitting’s ability to form a secure, leak-proof connection with the hose or component it connects to. Getting this wrong can jeopardize the integrity of the entire hydraulic system, not just a quick fix.
In short, measuring thread diameter should not be taken lightly. It requires precision, the right tools, and a double-checking mindset. Getting this right sets the stage for a reliable and efficient hydraulic system.


After measuring the thread diameter, the next critical step is to determine the thread pitch. Thread pitch is a critical factor in ensuring compatibility and a leak-free system. Thread pitch is essentially the distance between individual threads, measured in threads per inch (TPI). A mismatch in thread pitch can result in a poor fit, causing leaks and even damaged threads.
To measure thread pitch, you need a specialized tool called a thread pitch gauge. This tool comes with a variety of inserts, each labeled with a different TPI value. To use it, simply align the blades with the threads of the fitting until you find an exact match. This will give you the TPI value of the fitting.
Now, you may ask, what’s so important about this? Even if two fittings have the same diameter, differences in thread pitch can cause them to be incompatible. For example, a 14 TPI 1-inch NPT fitting will not fit a 12 TPI 1-inch NPT fitting. The threads won’t line up and you’ll either end up with a loose connection or damage the threads by forcing them together.
Here’s a pro tip: Always double-check the thread pitch measurement. A small mistake here can lead to big problems. If necessary, take several readings and confirm the TPI according to the manufacturer’s specifications whenever possible.
In hydraulics, it’s all in the details, and thread pitch is one detail that should not be overlooked. It’s not just about making sure you tighten the joint, it’s about ensuring a secure, long-lasting connection that won’t fail under pressure.
Once the thread diameter and pitch have been determined, it’s time to focus on another critical aspect: the seat angle. Seat angle is often overlooked, but it plays a critical role in ensuring a leak-proof connection. The angle is the inclination of the fitting seat as it interacts with its mating parts. Mismatched seat angles can lead to leaks, reduced system efficiency, and even component damage.
To measure the seat angle, you need to use a protractor or an angle-measuring tool designed for hydraulic fittings. Place the tool on the fitting seat and read the angle. The process is simple and straightforward but requires precision. One degree of deviation can compromise the integrity of your hydraulic system.
The seat angle determines how well the fitting seals against its mating parts. A perfect fit creates a leak-proof seal that can withstand high pressures and harsh conditions. Conversely, a mismatch can lead to leaks, which can be not only a nuisance but also a serious operational hazard. Leaks can lead to hydraulic fluid depletion, increased maintenance costs, and even, in extreme cases, system failure.
Here’s a pro tip: Always check seat angle measurements against the manufacturer’s specifications. This double-checking ensures that you are doing it correctly and helps you avoid costly mistakes.
In short, measuring the seat angle is a step that cannot be skipped or rushed through. It requires the right tools, consistent operation, and a meticulous attitude. Giving seat angle the attention it deserves not only ensures a leak-free connection but also improves the overall reliability and efficiency of your hydraulic system.
So the next time you choose a hydraulic fitting, don’t just focus on the threads. Give due attention to the valve seat angle as well. This small detail can have a major impact on the performance and reliability of your hydraulic system.


When it comes to hydraulic fittings, length is often the forgotten dimension. While thread diameter, pitch, and seat angle get all the attention, fitting length is just as critical to system performance and safety. Incorrect length can lead to improper sealing, increased stress on the fitting, and even system failure.
To measure fitting length, you’ll need a reliable measuring tool such as a caliper or straightedge. Align the tool with the joint, starting at one end and extending all the way to the other. Make sure you measure the entire length, including any flanges or extensions that may be part of the joint. You can’t use approximations for this step; accuracy is key.
Length directly affects a fitting’s ability to form a secure connection. Too short, and there’s a risk of an incomplete seal, leading to leaks. Too long, and it puts too much pressure on the joint and connecting parts, potentially leading to cracks or breaks over time.

You’ve measured thread diameters, determined thread pitches, checked seating angles, and even verified joint lengths. But there’s one more critical step before you continue with the installation: cross-referencing the measurements. In this step, you take out your reference charts and double-check that each measurement meets industry standards and your specific needs.
Even small differences in measurements can lead to serious problems. Cross-referencing is the final quality check to ensure that the fittings you’re about to install are the correct fittings for your hydraulic system. It’s the last line of defense against leaks, inefficiencies, and potential system failures.
To cross-reference, compare your measurements to the data on a reference chart. These charts often include standard sizes, thread types, and dimensions for various hydraulic fittings. Make sure your fitting measurements match the types and sizes listed. If they don’t match, you’ll have to redesign.
Here’s a pro tip: Always have the latest reference charts on hand. Manufacturers occasionally revise specifications, and using outdated information can lead to errors.
In conclusion, cross-referencing measurements is not only a best practice but a necessity for anyone who values the reliability and safety of their hydraulic systems. It’s the final step in confirming that you’ve done your due diligence to ensure that the fittings you install today won’t cause problems tomorrow. Taking the time to cross-reference sets the stage for a durable hydraulic system.
When it comes to hydraulic fittings, there is very little margin for error. Even seasoned professionals can make mistakes that compromise the integrity of the system. Here are some common mistakes to watch out for:
It’s a common misconception that the tighter you tighten, the better. Over-tightening hydraulic fittings can distort their shape, which can lead to leaks and even component failure. The key is to find a proper position so that the joint is firm but not stressed. Always use a torque wrench and follow the manufacturer’s torque specifications to avoid this mistake.
In the world of hydraulics, not all threads are created equal. Using an incompatible thread type can definitely lead to failure. Always double-check that the threads of the fitting match the threads of the connected component. A mismatch can lead to leaks, inefficiency and even catastrophic failure.
Sealing is an art in itself. Using the wrong sealing method or material can compromise the integrity of your hydraulic system. Always follow the manufacturer’s instructions when using a sealing method. Whether it’s a thread sealant or an o-ring, using the correct sealing method is critical to a leak-proof connection.
By following these guidelines, you can ensure optimal performance and safety of your hydraulic system. If you only have old fittings and are not sure about the measured data, then you are welcome to contact us and we can give you an accurate answer!
Use a caliper to measure outer diameter (OD) of male threads or inner diameter (ID) of female threads in inches/mm, then match to SAE/ISO charts (e.g., 1″ OD = -16 dash size).
Check thread angle and profile – NPT is 60° tapered, BSPP is 55° parallel, Metric is 60° flat crests. Use thread pitch gauges for verification.
Measure from sealing surface (flared face/O-ring groove) to the end of threads on straight fittings, excluding collars or nuts.
A numbering system (-4, -8, -16) where dash size = 1/16″ increments (e.g., -8 = 8/16″ = 1/2″ tube OD).
For SAE ports: Measure major thread diameter; Count threads per inch (TPI); Confirm straight (ORFS) vs tapered (NPT)
Place 37° JIC or 45° SAE angle gauge against sealing surface – proper contact with no light gaps indicates correct angle.
Find out more about Topa Blog and learn more about specialized hydraulic fittings.