Hydraulic systems are the lifeblood of many industrial operations, powering everything from construction equipment to manufacturing processes. However, they are not without their challenges, primarily in the form of leaking hydraulic fittings. Not only do these leaks cause loss of hydraulic fluid, they also lead to downtime and potential safety hazards. This comprehensive guide is designed to walk you through the entire process of identifying, repairing, and preventing hydraulic joint leaks, from the initial stages of identifying the problem to the final steps of testing and verification.
Understanding why leaks happen is the first step in preventing them. Let’s dive into the common reasons behind hydraulic fitting leaks.
Nothing lasts forever, and hydraulic fittings are no exception. Over time, the constant pressure and flow of hydraulic fluid can wear down seals and O-rings. This natural wear and tear can lead to small gaps where leaks can occur. Regular maintenance can help catch this issue before it becomes a problem.
Improper installation is one of the leading causes of leaks. Whether it’s an over-tightened pipe fitting or an improperly aligned component, these mistakes can lead to hydraulic fluid leaks. Always follow the manufacturer’s guidelines and consider hiring a qualified technician to perform the installation to avoid this problem.
Nothing lasts forever, and hydraulic fittings are no exception. Over time, the constant pressure and flow of hydraulic fluid can wear down seals and O-rings. This natural wear and tear can lead to small gaps where leaks can occur. Regular maintenance can help catch this issue before it becomes a problem.
Cracks in hydraulic fittings are often the result of over-tightening or using the wrong tools during installation. These cracks can be tiny but are enough to allow hydraulic fluid to escape. Always use the correct tools and follow torque specifications to avoid this issue.
Another common cause is material incompatibility. Using fittings, seals, or o-rings made from materials that are not compatible with hydraulic fluid can lead to deterioration and, ultimately, leaks. Always double-check material compatibility before making any replacements.
A mismatch in the sizes of your fittings and hoses can lead to leaks. If the dimensions are not aligned correctly, it creates an imperfect seal, allowing fluid to escape. Make sure to double-check the sizes and compatibility of your components before installation.

Corrosion is another silent enemy. Over time, moisture and chemicals can corrode the metal fittings, creating weak spots where leaks can form. Opt for corrosion-resistant materials and coatings to prolong the life of your fittings.
One small leak can lead to another. A leak in one part of the system can increase pressure elsewhere, causing additional leaks. It’s crucial to address even minor leaks promptly to prevent a cascade of problems.
In the world of hydraulics, recognizing leaks is half the battle. Let’s break down how to spot them safely and effectively.
First and foremost, safety comes first. Before checking your system, make sure you are wearing the correct personal protective equipment (PPE). We’re talking gloves, safety goggles, and even a face mask if it’s a high-pressure system. Next, depressurize the hydraulic system. This step is critical to avoid accidental spewing of hydraulic fluid, which can be both dangerous and messy.
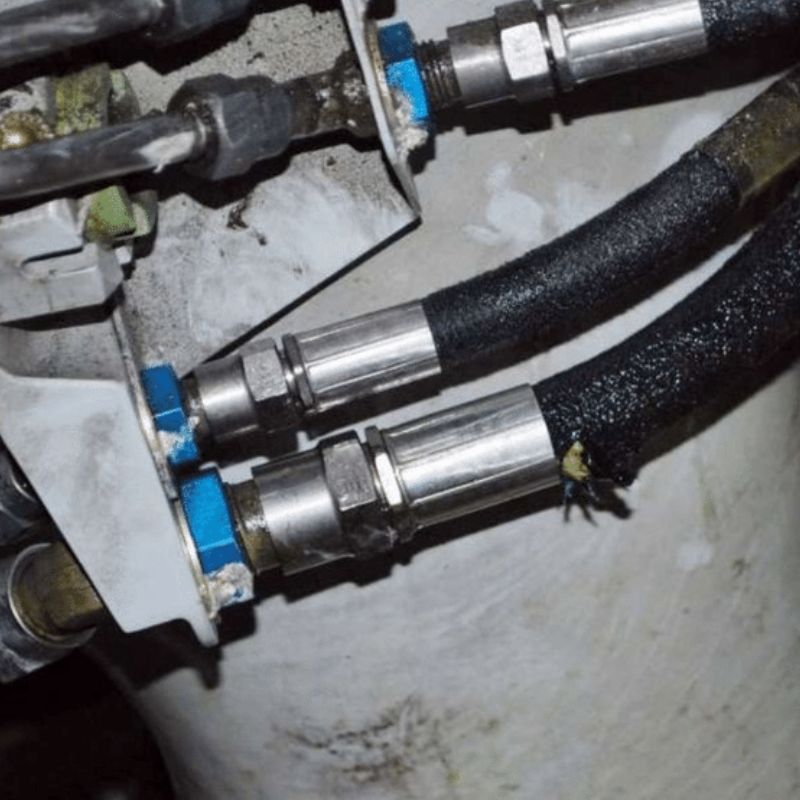
Now that you’re ready to go, it’s time for an inspection. Begin with a visual inspection. Look for obvious signs, such as wet spots on the hydraulic fluid pool or fittings. For those hard-to-find leaks, you’ll need to use a large diagnostic tool. Ultrasonic leak detectors are your best friend. These gadgets detect the high-frequency sound waves generated by leaks and help you pinpoint the location.
You’ve found the leak. That’s great! But don’t rush to fix it just yet. Mark the leak with a non-permanent marker. This step will make it easier for you to start the repair work. Also, take some photos. These photos can serve as a valuable record of future repairs or in case you need to explain the problem to someone else.
Catching leaks early is not just a maintenance task, it’s a safety imperative. A small leak can quickly escalate into a major problem, affecting system performance and even posing a safety risk. In addition, the sooner you catch a leak, the less hydraulic fluid you’ll waste, saving you time and money.
When it comes to repairing hydraulic fitting leaks, having the right tools and materials is crucial. Let’s break down the tools and materials needed to get the job done efficiently and safely.

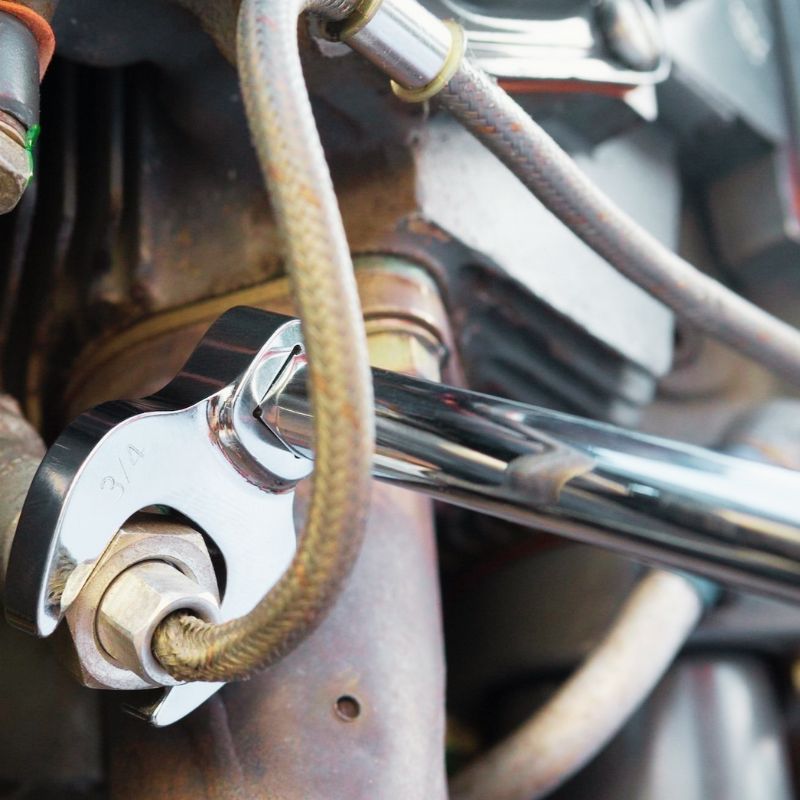
You will need a quality set of wrenches to loosen and tighten fittings. Make sure you have a variety of wrench sizes to fit different parts. The right wrench will ensure that you don’t strip threads, which is a common cause of leaks.
These specialized tools are essential for removing old seals and o-rings without damaging the surrounding metal. A good seal pick will allow you to complete repairs quickly.
This fluid is applied to fittings to help identify leaks. It reacts with the hydraulic fluid and makes leaks visible even to the naked eye. This is a must-have for a thorough inspection.

Always keep some replacement o-rings on hand. They are usually the first to wear out and are often the culprit of minor leaks.
This material is applied to the threads of a fitting to create a leak-proof seal. It is an extra layer of protection that will save you time and money in the long run.
The service area must be cleaned before starting repairs. Specialized cleaning solvents for hydraulic systems remove dirt and hydraulic oil, ensuring clean work surfaces.
Having the right tools and materials not only makes the repair process go smoother, it also ensures the longevity and efficiency of your hydraulic system. An investment in quality tools and materials is an investment in the reliability of the entire hydraulic system.
Proper preparation is the cornerstone of any successful repair job, especially when it comes to hydraulic systems. Let’s take an in-depth look at the key steps you need to take before applying a wrench.
First, you need to safely shut down the hydraulic system. Turn off the power and stop the system from running. Then, depressurize the system by releasing the built-up pressure through the appropriate valves. This step is critical because working on a pressurized system can easily lead to disaster. It can lead to an accidental burst of fluid or even cause the machine to move unexpectedly. Always double-check to ensure that the system is fully depressurized before proceeding.
Once the system is shut down and depressurized, it’s time to drain the hydraulic fluid. Place a drain pan or container under the system to collect the fluid. Use the system’s pressure relief valve to safely release the hydraulic fluid. Make sure you wear personal protective equipment to avoid contact with the hydraulic fluid during this process. Proper fluid draining is important because it not only makes the repair process easier, but also minimizes the risk of fluid contamination. Dispose of drained fluids in accordance with local environmental regulations. Neglecting this step could result in contamination that could affect the entire repair.
After draining the fluid, the next step is to clean the work area. Use a specialized cleaning solvent designed for hydraulic systems to remove any dirt, dust, or residual hydraulic fluid. A clean work area is not just for aesthetics, it is essential to prevent contamination during maintenance. Contaminants can damage new seals and joints, leading to future leaks and system inefficiencies.
You may skip some of these steps to save time, but cutting corners in the preparation phase can cost you dearly. For example, failing to shut down a system properly can create a safety hazard. Similarly, neglecting to clean your work area can introduce contaminants that can compromise the integrity of your repair. In essence, each preparation step is the cornerstone of a successful, lasting repair.
Once you’ve prepared your workspace and secured your system, it’s time to roll up your sleeves and start the actual repair. Here’s a comprehensive guide to the repair procedures you’ll need to follow.
Begin by identifying the leaking accessory you marked earlier. Using an appropriately sized wrench, carefully loosen and remove the fittings. Be sure to place them in a tray or container so that you do not lose any small parts. Always remember “righty-tighty, lefty-loosey”.
After removing the fitting, it is time to replace the seals and o-rings. Without damaging the fitting, use a seal pick to remove the old seal. Then, lubricate the new seals with hydraulic fluid and carefully place them into position. Make sure they are flush with the fitting to create a perfect seal.
Apply thread sealant to the threads before reassembling the fitting. This will add an extra layer of protection against future leaks. Use a brush or applicator to spread the sealant evenly, avoiding any globs that could interfere with tightening.
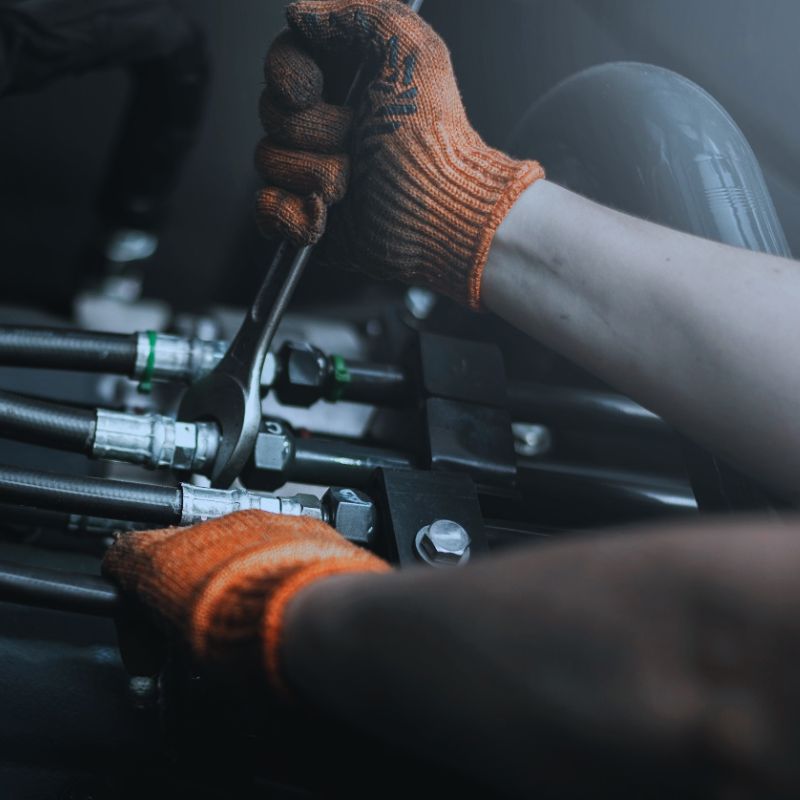
Now, it’s time to put everything back together. Reassemble the fitting and tighten it securely with a wrench. Be careful not to over-tighten, however, as this can lead to cracks and, ironically, more leaks. A torque wrench is a valuable tool to make sure you use just the right amount of force.
In short, repairing hydraulic fitting leaks is a meticulous process that requires attention to detail at every step. From disassembling a leaking fitting to replacing seals and applying thread sealant, every step you take can set the stage for a successful repair or trouble down the road. By following these maintenance procedures, you’ll not only fix the leak, you’ll ensure the long-term reliability and safety of your hydraulic system.
The final step in any repair job is testing and verification. You need to carefully check the details of the hydraulic couplings to make sure everything is correct.
Once everything has been reassembled, it’s time to perform a pressure test. This will confirm that the new fittings and seals are able to withstand the operating pressure of the system. To perform this test safely, you should gradually increase the pressure in the system while monitoring for any signs of leaks or bursts. Stay away from the machine at all times during the test to avoid any safety hazards. If the system is able to maintain its pressure without any problems, you have successfully repaired the leak.
After the pressure test, it’s a good idea to double-check for leaks using a leak detection fluid. Apply the fluid to the repaired fitting and observe. If the fluid reacts or bubbles, there is still a leak and the repair procedure needs to be rechecked. If not, there is no problem.
The final point is to document everything. Update the maintenance log with the details of the repair, including items replaced, types of materials used, and any observations made during the testing phase. This is not only for compliance reasons but also provides a valuable reference for future maintenance or repairs.
Testing and verification is the final and critical step in hydraulic fitting leak repair. From pressure testing to leak detection and documentation, each step ensures that your repair is not just a temporary, but a long-term solution. By following these guidelines, you will not only confirm the success of your repair, but also contribute to the continued reliability and safety of your hydraulic system.

When it comes to hydraulic systems, time is of the essence, especially when it comes to leaks. Turning a blind eye to even a minor leak can lead to a host of problems that can affect the efficiency and safety of your system. Here’s why it’s important to take immediate action.
● System Failure
First and foremost, leaks are a sign that a system is not operating at its optimal level. Over time, the loss of hydraulic fluid causes the system to work harder to maintain pressure, ultimately leading to system failure.
● Increased Operating Costs
Leaks mean money is being lost. Hydraulic fluid isn’t cheap, and neither is the energy used to keep a damaged system running. The longer you wait, the more you’ll spend on replenishing hydraulic fluid and replacing potential components.
● Safety Hazards
A leaking hydraulic system is not only inefficient, it’s also very dangerous. Hydraulic fluid is slippery and can easily cause accidents. Additionally, hydraulic system failures can lead to catastrophic events such as equipment failure, putting operators at risk.
In industry, time is money, and hydraulic fitting leaks can cost you both money and time. However, with the right knowledge and tools, these leaks are completely controllable. If you’re still in doubt, contact us, Topa has a professional staff that can help you!
