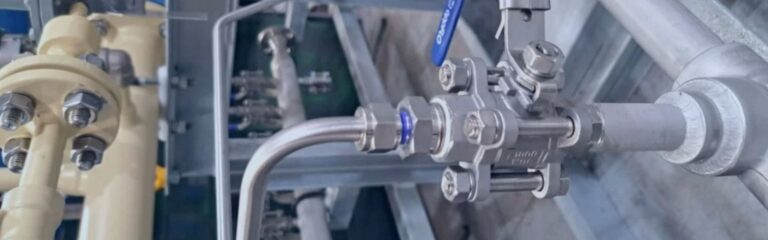
Welding hydraulic fittings is a key process in ensuring the functionality and reliability of hydraulic systems. The quality of welding directly impacts the performance and safety of the system. This process requires a specific set of skills and tools, including knowledge of welding techniques and the use of precision equipment. Proper welding ensures leak-proof connections, essential in systems where high pressure and fluid dynamics are involved. As it ensures the integrity and long-term functionality of hydraulic systems used in a wide range of industries. Understanding the basics of welding hydraulic fittings is fundamental for professionals working in fields that rely on hydraulic machinery.
Selecting the right tools and equipment is the first step in preparing for welding hydraulic fittings. This involves choosing a welding machine that suits the specific type of hydraulic fittings being worked on. The selection of electrodes, clamps, and other accessories is also critical. These tools must be compatible with the material of the fittings to ensure effective and safe welding.
Ensuring safety during welding is non-negotiable. Personal protective equipment, such as heat-resistant gloves, a welding helmet with appropriate shading, and safety glasses, are mandatory. This gear protects against common hazards like sparks, metal spatter, and intense ultraviolet and infrared light produced during welding.
The workspace should be orderly, clean, and well-ventilated to ensure a safe and efficient welding process. Removing any flammable materials and ensuring that the area is free from clutter reduces the risk of accidents. Adequate lighting is also crucial for precision in welding tasks. Preparing the workspace also involves setting up the welding machine and arranging all necessary tools within reach to create an organized and efficient welding environment.

When welding hydraulic fittings, the selection of the right welding process is crucial for ensuring strong and durable connections. This choice involves an understanding of various welding methods, each offering distinct advantages and challenges, and their suitability for different types of fittings and materials.
TIG (Tungsten Inert Gas) Welding: Known for its precision and control, TIG welding is ideal for welding complex shapes and thin materials. It allows for greater accuracy but is generally slower and requires higher skill levels.
MIG (Metal Inert Gas) Welding: MIG welding is faster and can be used for a variety of material thicknesses. It’s suitable for longer welds and is easier to learn, but it may not provide the same level of precision as TIG welding.
Stick Welding: This is a more traditional form of welding, known for its robustness and effectiveness in outdoor or rough environments. It can be used on most alloys and metals, but it requires significant skill to produce clean welds.

TIG Welding: Offers high-quality, precise welds, ideal for delicate fittings. However, it’s slower and not suitable for thick materials.
MIG Welding: Versatile and fast, great for a range of materials and thicknesses. However, it might not be as clean or precise as TIG welding, especially on very thin materials.
Stick Welding: Excellent for tough conditions and thick materials. It is less sensitive to paint and rust, but it can be less precise and harder to master.
For stainless steel and aluminum fittings, TIG welding is often the best choice due to its precision and ability to handle thinner materials.
MIG welding is suitable for carbon steel fittings, especially when working with thicker materials or requiring faster production.
Stick welding is ideal for outdoor repairs or in environments where precision is less critical, and toughness is the priority.
In conclusion, the choice of welding process should be based on the material of the hydraulic fitting, the desired strength and appearance of the weld, and the welder’s skill level. Understanding the nuances of each method is key to ensuring optimal performance of the hydraulic system.
The selection of the appropriate filler material is a pivotal aspect of welding hydraulic fittings, playing a significant role in determining the weld’s overall quality and endurance.
Commonly used filler materials in hydraulic fitting welding include variants like mild steel, stainless steel, and aluminum. Each type brings unique properties to the table, like corrosion resistance and tensile strength, making them suitable for different welding scenarios.
The compatibility of filler material with the fitting material is vital. For example, a stainless steel filler is optimal for stainless steel fittings. This compatibility ensures the weld’s structural integrity and prevents issues like corrosion or metal fatigue.
Environmental factors, such as exposure to chemicals or extreme temperatures, should influence filler material choice. A material that resists these conditions can significantly prolong the lifespan of the weld.
Opt for filler materials that closely match the metallurgical composition of the fittings. This strategy helps in maintaining consistency in expansion and contraction rates between the welded parts.
Consider the welding technique being employed. Certain filler materials may have better flow characteristics suited for specific welding methods, such as TIG or MIG.
A critical step in welding hydraulic fittings is the correct setup of the welding machine, which ensures the quality and strength of the weld.
Start by checking the welding machine for any signs of wear or damage. Ensure it is in good working condition.
Connect the machine to a power source and properly ground it to prevent electrical hazards.
Based on the material and thickness of the hydraulic fittings, select the appropriate amperage and voltage settings. For instance, thicker fittings usually require higher amperage.
Install the correct type of welding wire or electrode. This should be chosen based on the compatibility with the material of the fittings.
Test the machine on a scrap piece of similar material to ensure the settings are correct.
Thicker and larger fittings may require more heat and a higher amperage setting to ensure proper penetration.
For thinner fittings, lower the amperage to prevent burning through the material. Precision is key here.

If the weld appears weak or poorly formed, recheck the amperage settings. An increase may be necessary for stronger welds.
Excessive spatter can be a problem, often rectified by adjusting the voltage or checking the polarity settings.
Regular maintenance checks like ensuring clean and secure connections at the welding tip and ground clamp can solve many common issues.
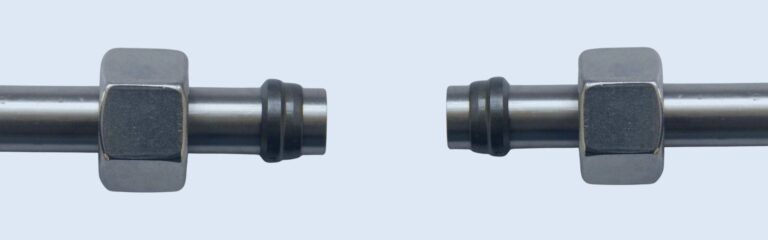
Thorough cleaning and preparation of hydraulic fittings are pivotal steps in the welding process, significantly influencing the quality of the weld.
Cleaning is essential to eliminate potential contaminants like oils, grease, dirt, and rust, which can negatively impact the weld quality. Clean surfaces ensure better weld adhesion and reduce the likelihood of weld defects such as porosity or inclusions.
Begin with a degreasing solvent to remove any oily residue. For tougher grime or rust, mechanical methods like using a wire brush or a grinder are effective.
Ensure both the fitting and its immediate welding area are cleaned. This step is crucial for materials like stainless steel, where even small contaminants can significantly impact weld quality.
Inspect the fittings post-cleaning for any surface defects, cracks, or other damage that could affect the welding process.
Securely clamp the fittings in the desired position. Proper alignment is key to achieving a strong, uniform weld.
Some materials may benefit from preheating before welding, as it can minimize thermal shock and reduce the risk of cracking, especially in thicker or more rigid materials.
A meticulously cleaned and prepared fitting is foundational for a successful welding job. This attention to detail ensures the integrity and strength of the weld, contributing to the overall reliability of the hydraulic system.
The welding process for hydraulic fittings is critical for ensuring structural integrity and longevity of the connections.
Start by clamping the hydraulic fitting securely. A stable setup prevents movement during the welding process.
Preheat the fitting if necessary, especially for thicker materials, to ensure even heat distribution.
Begin welding at the joint, maintaining a consistent arc length. Adjust your speed and motion to ensure the weld pool is well-controlled and penetrates the materials evenly.
For TIG welding, add the filler material steadily, matching the pace of the weld pool’s movement.
For irregularly shaped fittings, adjust your welding angle frequently to ensure proper coverage.
In tight spaces, use smaller electrodes or a more agile welding torch for better maneuverability.
When dealing with larger fittings, segment the welding process to manage heat distribution and reduce warping.
Continuously monitor the weld bead’s appearance. A uniform bead indicates a consistent weld.
Use pulse welding techniques for thin or delicate fittings to minimize heat input while maintaining weld quality.
After completing the weld, inspect the bead for any signs of defects such as cracks or porosity. A post-weld heat treatment can be beneficial for certain materials to relieve stress.
Following these detailed steps helps in achieving a weld that is not only strong but also aesthetically clean, ensuring the hydraulic fitting’s functionality and durability.
Completing the welding process requires thorough post-welding procedures to ensure the weld’s integrity and functionality.
Start with a meticulous visual inspection of the weld. Look for any signs of imperfections such as cracks, undercuts, or uneven bead profiles.
Use tools like a magnifying glass or ultrasonic equipment for a more in-depth inspection, especially for high-pressure applications.
Remove welding by-products like slag using a chipping hammer, wire brush, or appropriate cleaning solvent.
For applications requiring a smooth finish, employ finishing techniques like grinding or sanding. Be careful not to remove too much material, which could weaken the weld.
Perform strength tests, which can include applying controlled force to check the weld’s ability to hold under stress.
Conduct leak tests, essential for hydraulic systems. Methods like hydraulic pressure testing or dye penetrant testing can be used to detect any leaks.
Document the results of these tests for quality control and future reference.
In welding hydraulic fittings, certain common mistakes can significantly affect the outcome. Understanding these errors and knowing how to avoid them is crucial for quality welding.
Inadequate Heat Management: Applying too little heat leads to weak welds, while too much can distort the fittings.
Contamination: Failing to clean the fittings thoroughly results in impurities in the weld, causing weakness and potential failure.
Incorrect Electrode Handling: The wrong electrode angle or speed can lead to poor weld formation, uneven bead, and spatter.
Ignoring Material Properties: Not adjusting the welding process for different materials can result in poor welds. Each material, like stainless steel or aluminum, requires specific welding approaches.
Practice precise heat control. Use a welding machine with adjustable settings and be mindful of the material’s thickness and type.
Commit to a rigorous cleaning process. Use appropriate solvents and tools to ensure the fittings are free of oils, grease, and dirt.
Train in proper electrode handling. The right angle and speed are essential for a consistent and strong weld.
Understand the properties of the materials you are welding. Adjust your technique to suit different types of metals, considering factors like melting point and thermal conductivity.
Being aware of these common mistakes and actively working to avoid them through careful practice and technique adjustment will enhance the quality and reliability of your welding work.
For welders tackling complex scenarios, advanced tips and expert advice can be crucial.
Utilize pulse welding in tight or difficult-to-reach areas for better control and precision.
Implement multi-pass welding techniques for thick or layered fittings to ensure thorough penetration and strength. This method layers multiple welds, building up the joint’s strength.
Employ jigging or clamping for materials prone to warping to maintain alignment during welding.
In situations involving dissimilar materials, carefully select a filler metal that works well with both types to maintain the integrity of the weld.
Consider post-weld heat treatment for high-stress applications to alleviate internal stresses and enhance the durability of the weld.
These advanced strategies are designed to address the unique challenges that complex welding scenarios often present, ensuring a robust and lasting weld.
In summary, this guide has covered essential aspects of welding hydraulic fittings, from preparation and welding processes to post-welding care. We’ve emphasized the importance of selecting the right tools, materials, and techniques tailored to specific welding scenarios. Regular maintenance and a commitment to ongoing learning and practice are vital for mastering the art of welding hydraulic fittings. As you continue to refine your welding skills, remember that each step, from cleaning to testing, plays a crucial role in ensuring the strength and reliability of your work.
Welding hydraulic fittings is not typically recommended as they are usually designed for threaded or compression connections, but it can be done in some custom applications.
TIG (Tungsten Inert Gas) welding is often the best method for welding hydraulic fittings due to its precision and clean finish.
Hydraulic fittings are usually made from steel, stainless steel, or brass, with stainless steel being the most commonly welded material.
Yes, it’s important to clean hydraulic fittings thoroughly before welding to remove any oil, dirt, or debris that can affect the weld quality.
Yes, high-pressure fittings require careful control of heat and welding techniques to prevent compromising the fitting’s strength and integrity.
Improper welding can weaken hydraulic fittings by altering the material properties or causing distortions, so it’s crucial to follow proper techniques and safety guidelines.
Find out more about Topa Blog and learn more about specialized hydraulic fittings.


