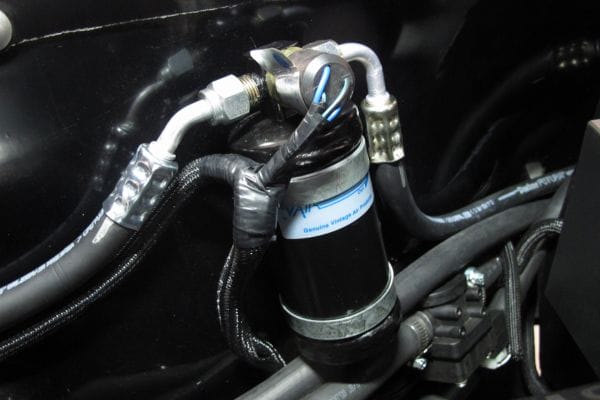
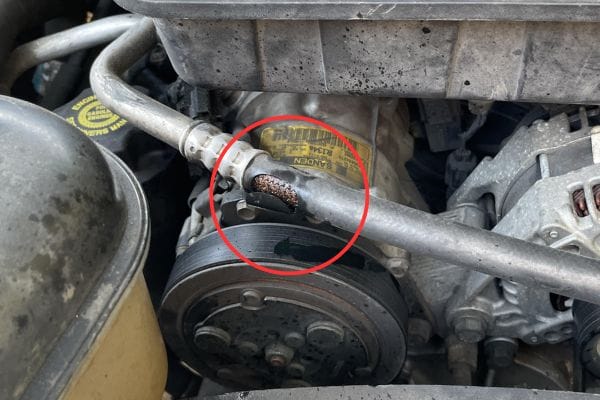
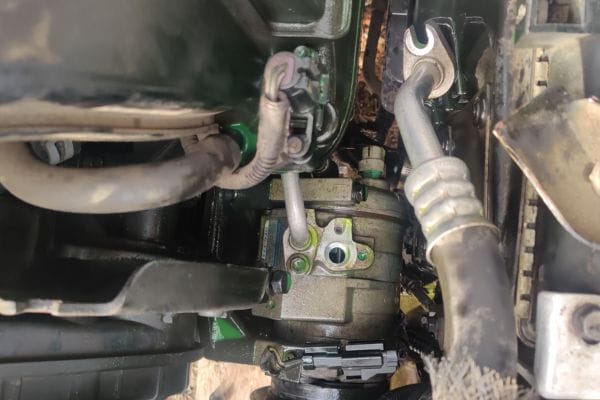
Air conditioning hoses are crucial components in an automotive AC system. They are responsible for transporting refrigerant and other fluids between various parts of the system, such as the compressor, condenser, and evaporator. These hoses ensure that the refrigerant can circulate effectively, enabling the AC system to cool the vehicle’s interior efficiently. Without properly functioning hoses, the AC system cannot perform optimally, leading to potential breakdowns and decreased comfort.
Understanding Air Conditioning Hoses
The function of AC Hoses
Role in the AC System
Transporting Refrigerant: Air conditioning hoses play a critical role in moving refrigerant between the various components of the AC system. This refrigerant absorbs heat from the interior of the vehicle and releases it outside, which is essential for cooling the cabin.
Maintaining Pressure and Flow: Hoses ensure that refrigerant flows at the correct pressure and volume. Proper flow is crucial for the system’s efficiency and overall performance.
Providing Flexibility: They accommodate the movement and vibrations of the vehicle, allowing the AC system to remain functional despite the constant motion and changes in temperature.
Different Types of AC Hoses and Their Functions
High-Pressure Hoses: These hoses transport refrigerant from the compressor to the condenser. They are built to withstand high pressure and temperatures.
Low-Pressure Hoses: These carry refrigerant from the evaporator back to the compressor. They operate under lower pressure and are designed for different temperature conditions compared to high-pressure hoses.
Discharge Hoses: These connect the compressor to the condenser and are responsible for carrying the hot, high-pressure refrigerant.
Suction Hoses: These link the evaporator to the compressor and handle the cooler, low-pressure refrigerant.

B. Components of the AC System
Overview of Related Components
Compressor: Often referred to as the heart of the AC system, the compressor pumps refrigerant through the system, increasing its pressure and temperature. It is crucial for initiating the cooling process.
Condenser: Located at the front of the vehicle, the condenser cools the high-pressure refrigerant coming from the compressor, turning it from a gas into a liquid.
Evaporator: Inside the vehicle’s cabin, the evaporator absorbs heat from the air, causing the refrigerant to evaporate into a gas. This process cools the air that is blown into the cabin.
How Hoses Interact with These Components
Connection to the Compressor: High-pressure hoses connect the compressor to the condenser, transporting the pressurized refrigerant.
Link to the Condenser: From the condenser, refrigerant moves through the high-pressure hose to the expansion valve or orifice tube before reaching the evaporator.
Interaction with the Evaporator: Low-pressure hoses transport the refrigerant from the evaporator back to the compressor, completing the cycle.
System Integration: Hoses must be properly connected to ensure that refrigerant flows seamlessly through these components, maintaining the AC system’s efficiency and effectiveness.
Common Warning Signs of a Failing AC Hose
A. Visible Cracks and Leaks
How Cracks and Leaks Develop
Wear and Tear: Over time, AC hoses can deteriorate due to exposure to extreme temperatures, UV radiation, and physical abrasion. This wear and tear can cause the rubber or synthetic material to crack.
Pressure and Temperature Stress: Repeated exposure to high pressure and temperature fluctuations can weaken hose materials, leading to splits or leaks.
Chemical Damage: Exposure to chemicals or oil can degrade hose materials, resulting in cracks or leaks.
Identification: Where to Check for Visible Damage
Surface Inspection: Check the length of the hoses for visible cracks, bulges, or splits. Inspect the areas where the hose is connected to other components for signs of leakage.
Connection Points: Look closely at the connections to the compressor, condenser, and evaporator. Leaks often occur at these joints.
Under Vehicle: Examine the hoses underneath the vehicle for any signs of drips or puddles, which can indicate a leak.
Effect on the Overall AC System
Reduced Efficiency: Leaks or cracks can cause refrigerant loss, leading to decreased cooling efficiency and potential system failure.
System Damage: Prolonged leakage can cause damage to other AC components due to insufficient refrigerant, affecting overall performance and leading to costly repairs.

B. Loss of Cooling Efficiency
Symptoms of Reduced Cooling Performance
Insufficient Cooling: The AC system may not cool the cabin as effectively, resulting in warmer air blowing from the vents.
Temperature Fluctuations: Inconsistent or erratic cooling performance can be a sign of underlying hose issues.
How to Test for Efficiency Issues
Check Temperature Output: Use a thermometer to measure the air temperature coming out of the vents. Compare this with expected temperatures for the vehicle’s AC system.
Evaluate System Pressure: Use a pressure gauge to check the refrigerant pressure in both high and low-pressure sides of the system.
Potential Causes Related to Hose Problems
Refrigerant Loss: Leaky or damaged hoses can cause refrigerant to escape, leading to reduced cooling efficiency.
Pressure Imbalances: Hoses that are cracked or blocked can disrupt the proper flow and pressure of the refrigerant, affecting system performance.
C. Unusual Noises
Common Noises Indicating Hose Failure
Hissing: A hissing sound can indicate refrigerant escaping from a damaged hose or connection.
Whistling: Whistling noises may suggest air or refrigerant is being forced through a partially blocked or damaged hose.
How to Pinpoint the Source of the Noise
Listen Carefully: Pay attention to when and where the noises occur (e.g., during acceleration or while the AC is on).
Inspect the Hoses: Locate the source of the noise by visually inspecting and feeling along the hoses to find any irregularities or areas of damage.
Consequences for the AC System
Performance Issues: Unusual noises can indicate that the AC system is not operating as it should, potentially leading to reduced cooling efficiency.
Potential Damage: Ignoring these noises can lead to further damage to the AC system components due to improper refrigerant flow.
D. AC System Pressure Issues
Signs of Pressure Fluctuations or Low Pressure
Fluctuating Pressure: Inconsistent pressure readings can indicate problems with the hoses or other AC components.
Low Pressure: Persistently low pressure may signal a refrigerant leak or a blockage within the hose.
Tools and Methods to Measure System Pressure
Pressure Gauges: Use an AC manifold gauge set to measure the refrigerant pressure on both the high and low sides of the system.
Professional Diagnostic Tools: Advanced tools like electronic leak detectors can provide more precise measurements and detect leaks.
How Pressure Issues Relate to Hose Health
Flow Disruption: Pressure issues often result from hose damage or blockages, disrupting the flow of refrigerant and affecting system efficiency.
System Imbalance: Improper pressure can lead to an imbalance in the AC system, potentially causing further component damage.
E. Increased Refrigerant Consumption
Frequency of Refrigerant Refills
Frequent Refills: Regularly needing to add refrigerant may indicate that there is a leak or inefficiency in the AC system.
Gradual Decline: A gradual decrease in refrigerant levels over time is a common sign of hose issues.
How to Check for Leaks or Inefficiencies
Leak Detection: Use dye or electronic leak detectors to find where refrigerant might be escaping.
System Inspection: Check all hoses, connections, and components for signs of leakage or damage.
Long-Term Effects on the AC System
Increased Costs: Frequent refrigerant refills can become costly and indicate a need for more significant repairs.
System Wear: Constant low refrigerant levels can lead to increased wear on the compressor and other components, potentially causing system failure.
Diagnosing and Repairing AC Hose Issues
A. Diagnostic Tools and Methods
Visual Inspection
Surface Examination: Carefully inspect the entire length of each hose for visible signs of wear, such as cracks, bulges, or splits.
Connection Points: Examine the areas where hoses connect to other components for signs of leakage or damage. Look for oil spots or refrigerant residue.
Flexibility Check: Gently squeeze and bend the hoses to detect any stiffness or irregularities that might indicate internal damage.
Pressure Gauges
Manifold Gauge Set: Connect the manifold gauge set to the service ports on the AC system to measure high and low-pressure readings. Compare these readings to the manufacturer’s specifications.
Pressure Variations: Look for fluctuations or consistently low or high pressure, which can indicate issues with the hoses or other components.
Leak Detectors
Electronic Leak Detectors: Use electronic devices that can sense refrigerant gas leaks by detecting the specific chemical signatures of refrigerants.
UV Dye and Black Light: Inject UV dye into the AC system and use a black light to trace any leaks, as the dye will glow under UV light.
Soap Solution: Apply a soapy water solution to hose connections and look for bubbles that indicate escaping refrigerant.
B. Temporary Fixes
Methods
Sealant Tapes: Use rubber or silicone sealant tapes to cover small leaks or cracks as a short-term solution.
Clamps and Patches: Apply hose clamps or repair patches to temporarily seal damaged areas and prevent further leaks.
Refrigerant Additives: Some refrigerant additives are designed to temporarily seal minor leaks; however, these should not replace proper repairs.
Limitations
Temporary Nature: These fixes are not permanent and may only provide a brief respite before issues reoccur.
Potential for Further Damage: Temporary fixes can mask underlying problems, potentially leading to more significant damage or system failure if not addressed properly.
Efficiency Issues: Temporary solutions might not fully restore the system’s efficiency, leading to continued performance problems.

C. Professional Repair and Replacement
When to Seek Professional Help
Persistent Issues: If temporary fixes do not resolve the problem or if new symptoms arise, it’s time to consult a professional.
Complex Problems: For extensive damage, recurring leaks, or if multiple components are affected, professional expertise is required to address the issues properly.
System Diagnosis: When the source of the problem is not clear, a professional can provide a comprehensive diagnostic to pinpoint and resolve the issue.
Repair Options
Hose Replacement: Replacing damaged hoses with new, high-quality ones to ensure proper functionality and system efficiency.
Component Repair: Repairing or replacing other affected components, such as the compressor or condenser, if damage extends beyond the hoses.
System Flush and Refill: Flushing the AC system to remove contaminants and refilling with fresh refrigerant to restore optimal performance.
Costs and Considerations
Repair Costs: Costs can vary depending on the extent of the damage, the type of repair needed, and labor rates. Replacing hoses typically ranges from $150 to $400, depending on the vehicle and parts.
Replacement Costs: Full replacement of damaged components or the AC system can be more expensive, potentially ranging from $500 to $2,000 or more.
Long-Term Savings: Investing in professional repair ensures proper and lasting fixes, potentially saving money in the long run by preventing further damage and maintaining system efficiency.
Preventive Maintenance for AC Hoses
A. Regular Inspections
Frequency
Routine Checks: Perform visual inspections of AC hoses every 6 to 12 months, especially before and after extreme temperature changes or long drives.
Seasonal Inspections: Conduct thorough inspections at the start of the cooling and heating seasons to ensure hoses are in good condition.
Checklist
Visual Condition: Check for cracks, bulges, or wear on the hose surface. Ensure there are no visible signs of leakage.
Connection Points: Examine the hose connections for any signs of looseness or leakage.
Flexibility: Ensure hoses remain flexible and do not show signs of brittleness or stiffness.
Pressure Testing: Use a pressure gauge to check for proper pressure levels in the AC system.
B. Proper Usage and Care
Handling
Avoid Sharp Objects: Keep hoses away from sharp edges or objects that could cause punctures or abrasions.
Protect from Heat: Ensure hoses are not exposed to excessive heat sources, which can degrade their material.
Secure Installation: Properly secure hoses to prevent movement or rubbing that could lead to wear.
Storage
Clean Storage: Store hoses in a clean, dry area to avoid contamination and damage.
Avoid Kinking: Coil hoses loosely without kinking to maintain their integrity and flexibility.
Cover Hoses: Use protective covers or bags to shield hoses from dust and debris if they are temporarily removed.
C. Replacing Old Hoses
Signs of Aging
Cracking or Drying: Look for visible signs of cracking, drying, or hardening of the hose material, indicating that the hose is past its prime.
Leaking: Persistent leaks at connection points or along the hose length suggest it may need replacement.
Reduced Flexibility: Hoses that have lost their flexibility and become rigid may need to be replaced to prevent system issues.
Choosing New Hoses
Compatibility: Ensure the new hoses are compatible with your vehicle’s AC system specifications and refrigerant type.
Quality: Opt for high-quality hoses from reputable manufacturers to ensure durability and performance.
Fit and Installation: Verify that the hoses fit correctly and are easy to install, considering factors like length, diameter, and connector types.
Warranty: Consider hoses with a warranty for added assurance and protection against defects.
Conclusion
Taking proactive steps to monitor and maintain your AC system not only ensures comfort but also safeguards your investment in vehicle maintenance. Stay vigilant, address any signs of trouble promptly, and consult professionals when needed to keep your air conditioning system running at its best.
FAQ
What are the common signs of a failing AC hose?
Common signs include visible cracks and leaks, reduced cooling efficiency, unusual noises like hissing or whistling, pressure fluctuations, and increased refrigerant consumption.
How often should I inspect my AC hoses?
It’s recommended to inspect AC hoses every 6 to 12 months, especially before and after extreme temperature changes or long drives.
What tools are needed to diagnose AC hose issues?
Diagnostic tools include visual inspection techniques, pressure gauges, leak detectors, and UV dye for finding refrigerant leaks.
Can I temporarily fix a leaking AC hose?
Yes, temporary fixes include using sealant tapes, clamps, and refrigerant additives. However, these are not long-term solutions and proper repairs should be made as soon as possible.
When should I replace my AC hoses?
Replace AC hoses if they show signs of cracking, drying, leaking, or reduced flexibility. Old hoses that no longer perform effectively should be replaced to avoid system issues.
What should I consider when buying new AC hoses?
Consider compatibility with your vehicle’s AC system, the quality of the hose, correct fit and installation, and any warranties offered for added protection.


