Grease fittings play a vital but often overlooked role in keeping machinery running smoothly and lasting long. These small parts ensure that critical moving parts are properly lubricated, thereby reducing friction and wear. However, grease fittings are often the source of frustrating problems such as clogs, leaks, or breaks, which can lead to costly downtime and repairs if not addressed in a timely manner. This article is designed to provide a comprehensive guide to grease fitting repair, offering step-by-step instructions and practical tips.
Causes of Clogging
Clogging in grease fittings is a prevalent issue that can arise due to several factors. One primary cause is the buildup of dirt, debris, or hardened grease within the fitting. Over time, contaminants can infiltrate the fitting and obstruct the flow of grease. Another common cause is the use of inappropriate or poor-quality grease, which can harden or become contaminated, leading to blockages. Additionally, lack of regular maintenance and infrequent lubrication cycles can contribute to clogging as grease solidifies and obstructs the pathway.
Signs of a Clogged Fitting
Identifying a clogged grease fitting is crucial to preventing further damage to machinery. One of the most obvious signs is difficulty in pumping grease through the fitting. If significant resistance is felt when using a grease gun, the fitting is likely clogged. Another indicator is the presence of dry or squeaky moving parts, suggesting that lubrication is not reaching the necessary components. In some cases, visible buildup of dirt or hardened grease around the fitting can also signal a clog.
Causes of Leaks
Leaks in grease fittings can occur due to a variety of reasons. One common cause is improper installation or insufficient tightening of the fitting, which allows grease to escape. Over-tightening can also damage the threads, leading to leaks. Another frequent cause is worn-out or damaged seals and O-rings within the fitting, which can deteriorate over time due to exposure to harsh operating conditions. Additionally, excessive pressure during lubrication can force grease out through weak points, causing leaks.
Impact of Leaks on Machinery Performance
Leaking grease fittings can have significant negative impacts on machinery performance. When grease leaks out, it fails to reach the intended moving parts, leading to increased friction and wear. This can result in overheating, accelerated component wear, and ultimately, mechanical failure. Leaks also create messy work environments and can attract dirt and debris, further exacerbating lubrication issues. In the long run, neglected leaks can lead to expensive repairs and prolonged downtime.

Causes of Damage
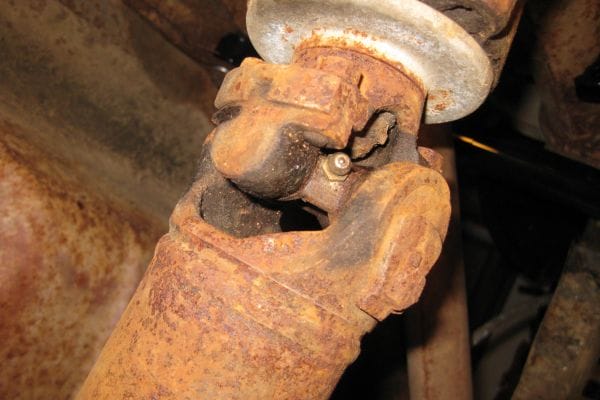
Grease fittings can become damaged due to several factors. Mechanical impact or accidental hits during maintenance or operation can break or bend the fittings. Corrosion is another common cause of damage, especially in environments exposed to moisture or corrosive substances. Additionally, improper tools or excessive force during installation and removal can weaken or fracture the fittings. Wear and tear from regular use can also lead to gradual deterioration and eventual failure.
Identifying Broken Fittings
Recognizing broken or damaged grease fittings is essential for timely repair and maintenance. Visible signs of damage include bent, cracked, or broken fittings, which are often evident upon inspection. If grease fittings are missing or show signs of corrosion, they likely need replacement. Difficulty in attaching a grease gun or achieving a secure connection can also indicate damage. Additionally, frequent lubrication failures or unexplained grease leakage may be symptoms of compromised fittings.
Grease Gun
A grease gun is an essential tool for any grease fitting repair. It is used to apply lubricant through the grease fitting and into the machinery’s lubrication points. Grease guns come in various types, including manual, pneumatic, and battery-operated models, each suited for different applications and preferences.
Wrenches and Pliers
Wrenches and pliers are crucial for removing and installing grease fittings. Adjustable wrenches can accommodate various sizes of fittings, while pliers can grip and twist fittings for removal or installation.
Needle Adapters
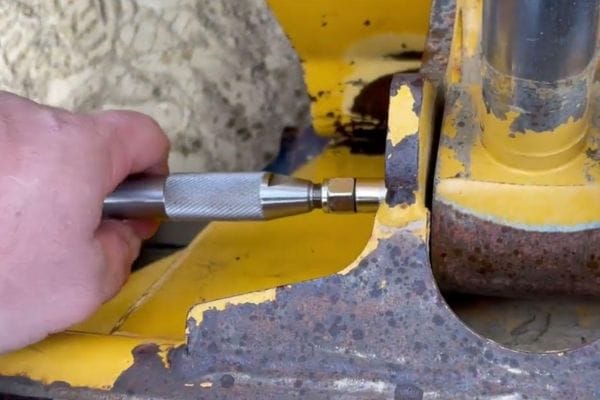
Needle adapters are specialized attachments for grease guns that allow precise application of grease into tight or hard-to-reach areas. They are particularly useful for fittings that are recessed or located in confined spaces where standard grease gun nozzles cannot reach.
Grease Fitting Cleaning Tools
Grease fitting cleaning tools are designed to clear blockages and contaminants from clogged grease fittings. These tools typically include small, specialized brushes and reamers that can clean the interior of the fittings without damaging them.
Grease Fitting Replacement Kits
Grease fitting replacement kits provide all the necessary components to replace damaged or worn-out grease fittings. These kits often include various sizes and types of fittings, seals, and installation tools.
Replacement Grease Fittings
Replacement grease fittings are essential for addressing broken or damaged fittings. It is important to have a variety of sizes and types available to match the specific needs of different machinery.
Grease Fitting Caps
Grease fitting caps protect fittings from dirt, debris, and moisture, which can cause clogging and corrosion. These caps are especially useful in harsh operating environments where contaminants are prevalent.
Lubricants and Solvents
It is important to select the appropriate type of grease for your specific application, considering factors such as temperature, load, and environment. Solvents are used to clean fittings and surrounding areas, removing old grease, dirt, and contaminants to prepare for new lubrication.
Before starting any grease fitting repair, it is essential to prioritize safety. Wear appropriate personal protective equipment (PPE) such as gloves, safety glasses, and protective clothing to prevent injuries from sharp edges, chemicals, and grease. Ensure that the machinery is turned off and properly secured to prevent accidental movements. If the repair involves working on elevated equipment, use fall protection gear as necessary. Additionally, read and follow any manufacturer-specific safety guidelines for your machinery and tools.
Assembling Necessary Tools and Materials
Gather all the tools and materials required for the repair before beginning. This includes basic tools like a grease gun, wrenches, and pliers, as well as specialized tools such as grease fitting cleaning tools and replacement kits. Ensure you have the appropriate replacement grease fittings, grease fitting caps, lubricants, and solvents on hand. Having everything prepared in advance will streamline the repair process and reduce downtime.
Removing and Cleaning the Fitting
Use a wrench or pliers to carefully remove the clogged grease fitting from the machinery. Be cautious not to damage the fitting or surrounding components.
Once removed, inspect the fitting for visible blockages or hardened grease.
Use grease fitting cleaning tools, such as small brushes or reamers, to thoroughly clean the interior of the fitting. Remove all debris and old grease.
If necessary, soak the fitting in a solvent to dissolve stubborn grease and contaminants. Ensure it is completely dry before reinstalling.
Reinstalling and Testing
Reinstall the cleaned grease fitting into its original position, using a wrench or pliers to secure it tightly but without over-tightening.
Attach the grease gun to the fitting and pump grease into it to ensure it is functioning correctly. Observe if the grease flows smoothly through the fitting.
If the fitting is still clogged, repeat the cleaning process or consider replacing the fitting with a new one.
Tightening Loose Fittings
Inspect the leaking grease fitting to determine if it is loose. Use a wrench to tighten the fitting securely.
Be careful not to over-tighten, as this can damage the fitting or threads.
Replacing Seals and O-Rings
If tightening the fitting does not stop the leak, remove the fitting using a wrench or pliers.
Inspect the seals and O-rings for wear or damage. Replace them with new ones if necessary.
Reinstall the fitting with the new seals and O-rings, ensuring a snug fit.

Removing the Damaged Fitting
Use a wrench or pliers to carefully remove the broken or damaged grease fitting. Be gentle to avoid damaging the threads or surrounding components.
If the fitting is severely damaged and difficult to remove, consider using specialized extraction tools.
Installing a New Fitting
Select a new grease fitting that matches the size and type of the original.
Apply a small amount of lubricant to the threads of the new fitting to ensure smooth installation.
Carefully screw the new fitting into place using a wrench or pliers, ensuring it is securely tightened.
Test the new fitting by attaching the grease gun and pumping grease through it to confirm proper operation.
To maintain optimal performance of your machinery, it is crucial to conduct regular inspections of grease fittings. The frequency of these checks can vary based on the operational environment and usage intensity of the equipment. However, a general guideline is to perform inspections at least once a month. For machinery operating under harsh conditions or high usage, more frequent inspections, such as bi-weekly or even weekly, may be necessary.
What to Look for During Inspections
During inspections, focus on several key areas to ensure that grease fittings are in good working condition:
Choosing the Right Grease
Selecting the appropriate grease is essential for effective lubrication. Consider the following factors when choosing grease:
Proper application of grease is crucial to ensure effective lubrication:
Preventing contamination is key to maintaining the integrity of grease fittings:
Maintaining grease fittings is crucial for ensuring the smooth operation and longevity of your machinery. Regular maintenance prevents common issues like clogging, leaks, and damage, which can lead to costly repairs and downtime. Would you like any additional information or tips on specific aspects of grease fitting maintenance? Contact Topa for more information!
It is recommended to inspect grease fittings at least once a month. For machinery operating under harsh conditions or heavy use, consider more frequent inspections, such as bi-weekly or weekly.
Signs of a clogged grease fitting include difficulty in pumping grease through the fitting, dry or squeaky moving parts, and visible buildup of dirt or hardened grease around the fitting.
Choose grease based on viscosity, temperature range, and compatibility with your machinery and existing lubricants. Higher viscosity greases are suitable for high-load applications, while lower viscosity greases are better for high-speed applications.
First, try tightening the fitting. If the leak persists, remove the fitting and inspect the seals and O-rings for damage. Replace any worn-out seals and reinstall the fitting securely.
It is generally not recommended to mix different types of grease, as they may be incompatible and reduce lubrication effectiveness. Always use the same type of grease or ensure compatibility before mixing.
Use grease fitting caps to cover the fittings when not in use, clean tools before use, and perform maintenance tasks in clean environments to prevent dirt, moisture, and debris from contaminating the fittings and grease.