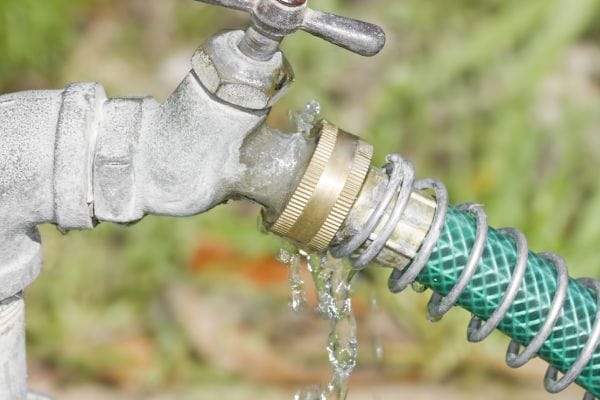
A leaking garden hose fitting may seem like a small issue, but it can quickly escalate into a major concern. Not only do leaks waste water—something many regions are trying to conserve—but they can also lead to costly water bills and damage to your plants.
Not Inspecting the Hose for Wear and Tear
One of the most common mistakes homeowners make is failing to regularly inspect their garden hose for signs of wear and tear. Over time, hoses are exposed to various elements—such as pressure, UV rays, and physical strain—that can cause them to deteriorate. If left unchecked, these issues can lead to leaks and inefficiencies.
Signs of hose deterioration and when to replace it
Garden hoses are built to last, but they don’t last forever. There are several key signs to look out for that indicate your hose is nearing the end of its life:
Cracks or splits: These often occur near the fittings or along the length of the hose. Cracks allow water to escape, leading to leaks.
Kinks and bulges: Prolonged use or improper storage can cause hoses to kink or develop bulges, weakening their structure and causing potential weak spots for leaks.
Fading or brittleness: Hoses exposed to intense sunlight can fade and become brittle. If you notice that the hose feels stiff or fragile, it may be time to replace it.
Leaks at connections: If you frequently have to tighten the fittings to stop leaks or notice constant drips, the hose may be worn out, and replacement could be the best solution.
If your hose is showing one or more of these signs, it’s a clear indication that it’s time for a replacement. Waiting too long to replace a deteriorating hose can result in more significant leaks, wasting water and causing damage to your garden.
How to properly inspect your garden hose for leaks
Inspecting your garden hose for leaks is an easy but essential task that should be performed regularly. Follow these steps for an effective inspection:
Check the fittings: Begin by looking closely at the fittings and connectors. Ensure they’re tightly screwed and free from damage. Look for cracks in the threads or signs of corrosion.
Examine the hose length: Lay out the hose fully to check for cracks, punctures, or bulges. Run your hands along the hose to feel for soft spots or areas that may have weakened over time.
Turn on the water: While the hose is connected to the faucet, turn on the water and check for any leaks around the connections. If you notice water dripping from the fittings or hose, it’s time to troubleshoot or replace the hose.
Inspect the nozzle and sprayer: The nozzle and sprayer can also be prone to wear. Make sure the nozzle is securely attached and free from any signs of cracks or leaks.
Overlooking the Importance of Sealing the Hose Correctly
Sealing is one of the most crucial aspects of ensuring a leak-free connection between your garden hose and its fittings. When done incorrectly, poor sealing can result in constant leaks, water wastage, and damage to your garden.
The role of sealing in leak prevention
The main purpose of sealing is to create a tight, secure connection between the hose and its fittings, preventing water from escaping through any gaps. Without proper sealing, even a small gap can lead to persistent leaks, wasting water and causing inconsistent water flow to your plants. When hose fittings are not sealed properly, they can also suffer from wear and damage, leading to bigger problems down the road.
A well-sealed hose ensures that water flows efficiently to the nozzle or sprinkler, providing consistent pressure and preventing the potential for leaks. Sealing also protects the hose and fittings from corrosion, especially when exposed to outdoor elements like UV rays or temperature fluctuations.
Common sealing mistakes to avoid
Even experienced gardeners can fall victim to sealing mistakes. Here are some of the most common errors people make when sealing their garden hose connections:
Using the wrong type of sealant: Not all sealants are suitable for hose fittings. Using materials not designed for high-pressure or outdoor water systems can lead to ineffective sealing and leaks. Be sure to choose a sealant that’s compatible with garden hoses and fittings.
Failing to replace worn-out washers: Washers or rubber gaskets are essential for creating a proper seal. If they’re cracked, damaged, or worn out, the seal will not be tight, leading to leaks. Always check washers before connecting the hose.
Over-tightening fittings: While it’s important to tighten the fittings, over-tightening can damage the threads or compress the gasket too much, causing a poor seal. Always follow the manufacturer’s recommendations for how tightly to secure fittings.
Under-tightening fittings: On the flip side, not tightening the fittings enough can also cause leaks. If the connection feels loose, water will escape. Make sure the fittings are securely tightened, but not overdone.
Avoiding these sealing mistakes is crucial for keeping your garden hose connections leak-free.
How to seal garden hoses properly for a leak-free connection
To prevent leaks, sealing your garden hose properly requires a few simple steps:
Inspect the hose and fittings: Before sealing, ensure both the hose and the fittings are in good condition. Look for cracks or wear in the hose, and make sure the fittings are free from damage. Replace any worn washers or gaskets.
Use the correct sealant: For threaded fittings, Teflon tape (also known as PTFE tape) or thread sealant paste is the most common solution. Wrap the Teflon tape around the male threads of the fitting in the direction of tightening. Be sure to use only a thin layer—too much tape can cause the threads to slip or break. For rubber washers or gaskets, make sure they’re clean and properly seated in the fitting.
Check for proper alignment: Ensure that the hose and fitting are properly aligned. Misalignment can lead to gaps, resulting in leaks. Attach the hose to the fitting and twist it securely without over-tightening.
Test the connection: Once the hose is sealed, turn on the water and check for leaks. If you notice any water seeping from the connection, carefully tighten the fitting a little more or reapply the sealant. It may take a few attempts to get it just right, but persistence pays off in preventing leaks.
Tips for using thread sealants and Teflon tape
Here are some practical tips to make your sealing process more effective:
Teflon tape: Wrap the tape around the threads 2-3 times for an airtight seal. Make sure the tape goes in the same direction as the fitting will turn, so it doesn’t unravel as you tighten the connection.
Thread sealant paste: If you prefer using paste, apply a small amount to the threads of the male connector. Spread it evenly and attach the fitting carefully to prevent excessive paste from oozing out.
Use high-quality products: Choose high-quality Teflon tape or thread sealants that are specifically made for outdoor and high-pressure systems. Cheap options can degrade faster and may not provide a proper seal.
Be mindful of the material: Some materials, like brass or stainless steel, are more durable and may not need as much sealing as other materials. However, plastic fittings often require more attention to sealing to prevent leaks.
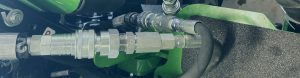
Incorrectly Installing Hose Fittings
Installing hose fittings correctly is crucial to ensuring a leak-free, efficient garden water system. Incorrect installation not only leads to leaks but can also cause long-term damage to the hose and fittings.
Step-by-step guide to proper hose fitting installation
Follow these steps to install your garden hose fittings correctly and prevent leaks:
Inspect the hose and fittings: Before starting, make sure the hose and fittings are in good condition. Check for cracks, tears, or any visible damage. Ensure that the fittings are the correct size and type for your hose.
Prepare the fitting: If you’re using a threaded fitting, apply Teflon tape or a thread sealant to the male threads of the fitting. Wrap the tape around the threads 2-3 times in the direction that the fitting will turn. This ensures a tight seal and prevents leaks.
Attach the hose to the fitting: Gently push the hose over the fitting or connector, making sure it’s fully seated. If the fitting has a washer or gasket, ensure it’s properly positioned inside the connector to create a secure seal.
Tighten the fitting: Secure the connection by tightening the fitting with your hands first. Once it’s hand-tight, use a wrench or pliers to tighten it further. Be careful not to over-tighten, as this can damage the threads or warp the fitting.
Test the connection: After installation, turn on the water and check for any leaks around the fitting. If you notice any leaks, tighten the connection slightly, or remove and reinstall the fitting with additional sealant if necessary.
Check for leaks: Ensure that the fitting is fully secure and that no water is escaping. Test the connection again by running water for several minutes to confirm that the seal holds.
By following these steps, you’ll ensure a proper installation that reduces the likelihood of leaks.
Common installation mistakes that cause leaks
Even experienced DIYers can make mistakes during installation , which leads to leaks. Here are some of the most common installation errors to watch out for:
Not using sealant or tape: Failing to apply thread sealant or Teflon tape on threaded fittings is a leading cause of leaks. These materials are necessary to create an airtight seal between the threads.
Over-tightening: Over-tightening the fittings can damage the threads, warp the fitting, or crack the hose, which can lead to leaks. Tightening the fitting just enough is key to a leak-free connection.
Under-tightening: On the flip side, under-tightening the fittings can also cause leaks. If the connection feels loose, water will escape. Make sure the fitting is snug but not overly tight.
Incorrect fitting size: Using the wrong size fittings for your hose or connectors can lead to poor seals and leaks. Always ensure that the fittings match the hose’s diameter and are compatible with your irrigation system.
Misaligning the hose and fitting: If the hose is not properly aligned with the fitting, it may not seal correctly, leading to leaks. Always ensure the hose fits flush against the fitting before tightening it.
How to ensure a tight, secure connection
To ensure that your hose fitting is tight and secure:
Use the right tools: A wrench or pliers can help achieve a tighter, more secure connection, but be careful not to overdo it. Use just enough force to create a snug fit.
Check the washer or gasket: Always inspect the rubber washer or gasket inside the fitting. These components create a seal that prevents water from leaking. If the gasket is damaged or worn, replace it before installing the fitting.
Double-check for leaks: After installation, check for leaks by running the water through the hose. Pay close attention to the area around the connection point. Tighten it further if necessary, but don’t go overboard.
Align properly: Make sure the hose and fitting are properly aligned. Misalignment can cause gaps that will result in leaks, so ensure they fit together snugly before tightening.
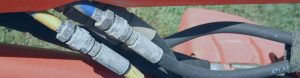
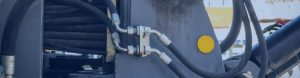
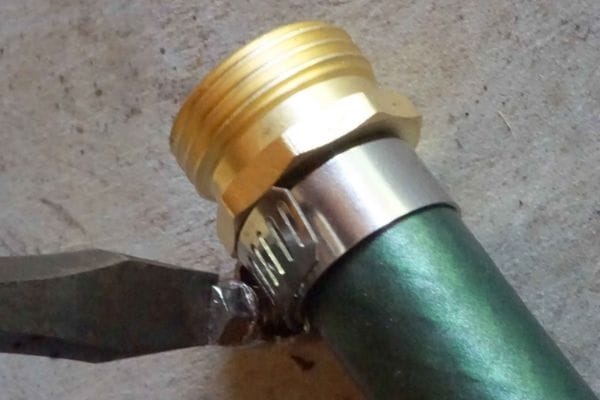
Not Using Hose Clamps When Needed
Hose clamps are a simple yet highly effective tool for securing garden hose fittings, ensuring a tight, leak-free connection. Many homeowners overlook their importance, assuming that simply tightening the hose fitting by hand is enough. However, neglecting to use hose clamps when necessary can lead to frustrating leaks and poor water flow.
The importance of hose clamps for secure fittings
Hose clamps serve a critical role in keeping the connection between the hose and its fittings tight and secure. They help apply even pressure around the fitting, ensuring that the hose remains firmly attached, preventing leaks and blow-offs. Without hose clamps, especially in high-pressure systems or when using certain types of fittings, the hose could slip off, causing water wastage, mess, or even damage to the hose.
Hose clamps are especially crucial for:
Securing hose connections: When connecting your garden hose to a spigot, nozzle, or other fittings, hose clamps create a tight seal that prevents water from escaping.
Pressure management: If your system uses higher water pressure, hose clamps are necessary to maintain a secure, leak-free connection. The pressure can cause fittings to loosen over time, but a hose clamp will keep everything in place.
Preventing hose slippage: In some situations, especially with larger hoses or larger connectors, simply relying on the friction between the hose and the fitting is not enough. A hose clamp ensures the hose stays securely in place.
Using a hose clamp is often the difference between a tight, leak-free connection and constant dripping or disconnections, making it a vital part of your hose setup.
When and how to use hose clamps effectively
Knowing when and how to use hose clamps is key to making sure they perform as intended. Here are the best practices for using hose clamps:
When to use hose clamps:
For high-pressure systems: If your garden hose is part of an irrigation system or attached to a high-pressure water source, always use a hose clamp to ensure a secure, leak-free connection.
When dealing with larger hoses or fittings: Larger hoses, particularly those with thicker walls or larger connectors, are more prone to slipping off or losing their grip. A hose clamp helps hold them firmly in place.
For hoses with a loose or damaged fitting: If a hose fitting has become slightly worn or damaged, a hose clamp can provide extra support and prevent water from leaking at the connection.
When using quick-connect fittings or adapters: Quick-connects and adapters often don’t provide the same level of secure attachment as a threaded connection. In these cases, hose clamps can help create a better seal.
How to use hose clamps:
Place the clamp around the hose: After connecting the hose to the fitting, position the hose clamp around the hose, right next to the fitting. Ensure the hose is seated fully in the fitting before clamping.
Tighten the clamp: Using a screwdriver or wrench, tighten the hose clamp by turning the screw in a clockwise direction. Be sure to tighten it enough to create a snug seal, but avoid over-tightening, which could damage the hose or fitting.
Test for leaks: After securing the clamp, turn on the water and check for leaks. If you notice water escaping, tighten the clamp slightly. If it continues to leak, you may need to replace the hose or fitting or adjust the clamp’s position.
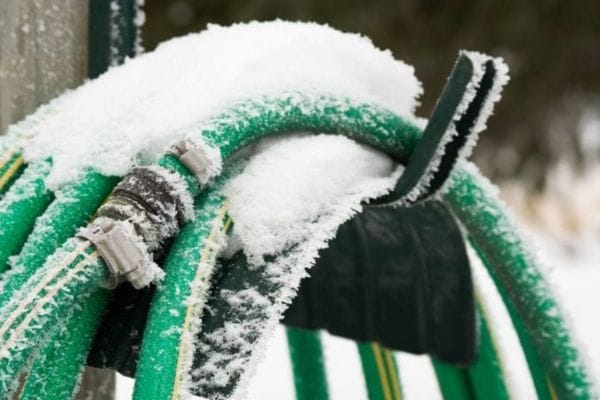
Not Disconnecting the Hose Properly in Winter
Winter weather can be tough on garden hoses and their fittings. Freezing temperatures, ice, and snow can cause serious damage to both the hose itself and the hose fittings, leading to leaks and costly repairs. Neglecting to properly disconnect and store your hose during the winter months is a common mistake that can cause unnecessary damage.
How freezing temperatures can damage hose fittings
Freezing temperatures are one of the most common causes of damage to garden hose fittings. Here’s how winter weather can impact your hose and its fittings:
Water expansion: When water inside the hose or fittings freezes, it expands. This expansion can crack or rupture both the hose and the fittings, leading to leaks when the hose is used again in warmer weather. Even a small amount of remaining water inside the hose can freeze and cause significant damage.
Frozen hose fittings: The fittings themselves, particularly those made of metal, can become brittle in freezing temperatures. If the hose is left connected to an outdoor faucet or spigot during winter, the fitting may crack or corrode, leading to leaks and poor water flow when it’s reconnected in the spring.
Frozen outdoor faucets: The outdoor faucet where the hose connects is also at risk. If water inside the faucet or connecting pipes freezes, it can cause cracks or breaks in the plumbing, resulting in leaks when the water thaws.
By not properly disconnecting the hose and draining out any remaining water before winter sets in, you’re allowing the freezing process to damage the entire system, from the hose to the faucet and fittings.
Best practices for storing hoses during the off-season
Taking the proper steps to store your hose during the winter months will prevent damage and extend the life of your hose and fittings. Here are the best practices for storing your garden hose in cold weather:
Disconnect the hose: Always disconnect the hose from the faucet before the first frost hits. Leaving the hose connected to the faucet can cause damage to both the hose and the faucet. Even if you live in a milder climate, it’s still a good idea to disconnect the hose before temperatures drop below freezing.
Drain the hose completely: After disconnecting the hose, be sure to drain any remaining water from the hose. Water left inside can freeze and cause the hose to crack. To drain the hose, lift one end of the hose higher than the other and let gravity do the work. If your hose has a nozzle, open it up to release any trapped water.
Store the hose indoors: Once the hose is drained, store it in a cool, dry place that doesn’t reach freezing temperatures. Storing the hose in an outdoor shed or garage is not ideal if those areas are subject to freezing. A basement, utility room, or even a warm closet is a better option. If indoor storage isn’t possible, consider storing the hose in a shed with proper insulation.
Avoid coiling the hose too tightly: When storing the hose, avoid tightly coiling it. A tightly wound hose can kink, crack, or weaken over time, especially when exposed to cold temperatures. Loosely coil the hose or lay it flat to prevent damage.
Store fittings separately (if possible): If the fittings are removable from the hose, consider storing them separately indoors. If you leave the fittings attached, they may freeze, crack, or corrode. Keeping them inside will prevent this kind of damage.
Conclusion
Maintaining leak-free garden hose fittings requires a combination of proper installation, regular inspection, and timely maintenance. By avoiding common mistakes, ensuring your fittings are sealed and tightened correctly, and replacing worn components promptly, you’ll keep your system running smoothly.
FAQ
How can I tell if my garden hose fittings are leaking?
If you notice water dripping or spraying around the connection points between the hose and fittings, it’s a sign of a leak. You may also hear water running or see wet spots around the fittings when the hose is in use.
How often should I replace the washers or gaskets in my hose fittings?
Washers and gaskets should be inspected regularly—at least once a season—and replaced if they show signs of wear, cracking, or brittleness. If you notice frequent leaks or poor sealing, it’s time to replace them.
What’s the best way to prevent leaks during the winter?
Always disconnect and drain your hose before the first frost. Store it indoors to avoid freezing, which can crack both the hose and the fittings. Additionally, consider installing a frost-proof faucet cover to protect outdoor spigots.
Can over-tightening hose fittings cause leaks?
Yes, over-tightening can damage the threads or warp the fittings, causing leaks. Always tighten the fittings by hand, and use a wrench only to secure them slightly—don’t overdo it.
Do I need hose clamps for every garden hose connection?
Hose clamps are essential for securing fittings, especially in high-pressure systems or when using larger hoses. They prevent the hose from slipping off and ensure a leak-free connection.
Why do I need to use Teflon tape on hose fittings?
Teflon tape (or thread sealant) helps create a tight seal between threaded fittings, preventing leaks. It’s especially important for threaded connections where water can escape if the seal isn’t airtight.